ワードプレスで自作テーマ作成-L28-記事タイトル下に日付とカテゴリを表示する-
ワードプレスで自作テーマ作成シリーズ
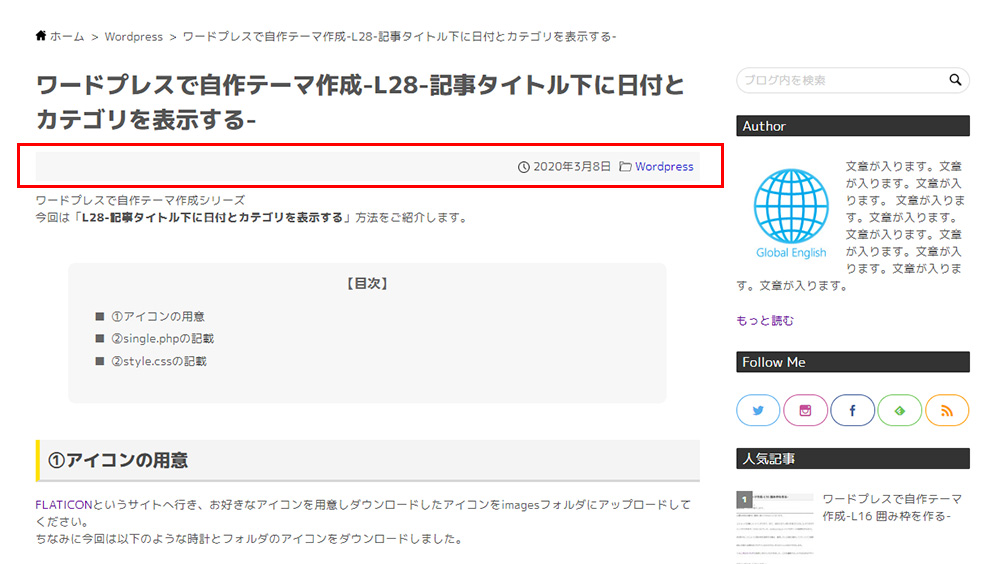
今回は「L28-記事タイトル下に日付とカテゴリを表示する」方法をご紹介します。
上記画像のように記事を書いた日付と、隣にカテゴリが表示されます。カテゴリ名をクリックするとカテゴリの記事一覧ページへ飛びます。
①アイコンの用意
FLATICONというサイトへ行き、お好きなアイコンを用意しダウンロードしたアイコンをimagesフォルダにアップロードしてください。
ちなみに今回は以下のような時計とフォルダのアイコンをダウンロードしました。
https://realinfojpn.xsrv.jp/flaticon-786.html
②single.phpの記載
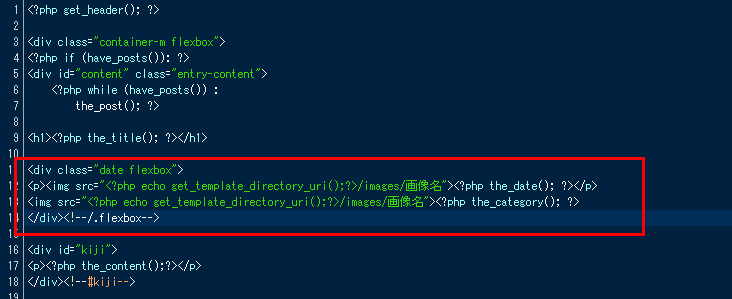
「single.php」に以下を記載してください。
This file contains hidden or bidirectional Unicode text that may be interpreted or compiled differently than what appears below. To review, open the file in an editor that reveals hidden Unicode characters.
Learn more about bidirectional Unicode characters
<div class="date flexbox"> | |
<p><img src="<?php echo get_template_directory_uri();?>/images/画像名"><?php the_date(); ?></p> | |
<img src="<?php echo get_template_directory_uri();?>/images/画像名"><?php the_category(); ?> | |
</div><!--/.flexbox--> |
2~3行目の「画像名」には任意のものを記入してください。
場所はh1タイトルの下です。
②style.cssの記載
「style.css」に以下を記載してください。
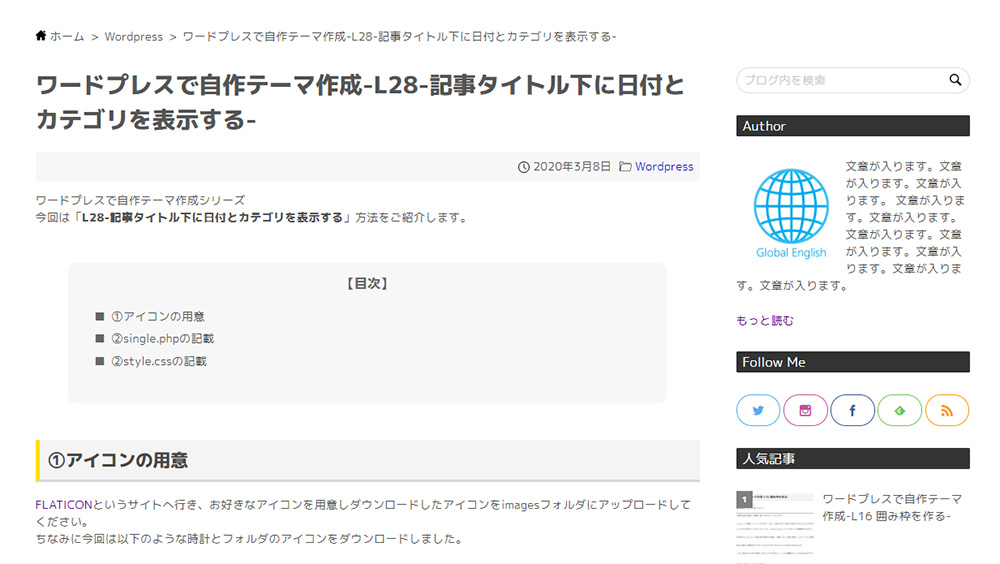
This file contains hidden or bidirectional Unicode text that may be interpreted or compiled differently than what appears below. To review, open the file in an editor that reveals hidden Unicode characters.
Learn more about bidirectional Unicode characters
/* 記事タイトル下の日付とカテゴリ */ | |
#single #content .date { | |
justify-content: flex-end; | |
background-color: #f7f7f7; | |
padding: .5em; | |
align-items: center; | |
} | |
#single #content .date p { | |
margin-bottom: 0; | |
} | |
#single #content .date img { | |
padding: 0 0.3em 0 0.7em; | |
vertical-align: middle; | |
} | |
#single #content ul { | |
list-style: none; | |
} | |
/*記事h1下マージン*/ | |
#single #content h1 { | |
margin-bottom: 20px; | |
} |
完成です!
コメント